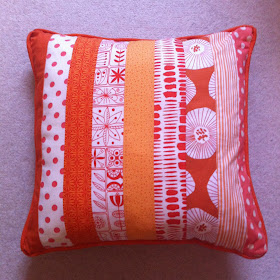
Making your own cushion is such a great way to practice a number of sewing techniques and add something unique to your home. A few months ago a good friend of mine moved into a beautiful furnished flat, decorated in a stylish black and white theme. The flat being furnished meant that my friend didn't have a lot of opportunity to add a bit of her style to the flat. Gradually an orange footstool, an orange rug and an orange throw were added to make the flat feel more like home, adding a touch of her style to the front room.
I wanted to help and decided to make a cushion that she could add to her front room. I haven’t made a cushion since I was at school so it was the perfect time to try again. As the cushion was going to be a surprise birthday gift I took a risk and decided to select the fabrics myself! I already had a colour theme, orange, so now I had to find a mix of fabrics that my friend would like. I searched on and off for a few months during the summer to find fabrics that would work together. I had a few pieces in my fabric stash and bought some new fabrics especially for the cushion, these included Summersville – Brush Strokes – Orange, Summersville – Scandi Floral – Orange, Simpatico – Straws Peachy and Nancy Murty S Dots Tangerine. I finally had the fabrics selected and so I made a start so that I could make the cushion in time for her visit to my flat.
After washing and pressing the fabric I decided to cut the fabric into strips.
I spent time deciding the design of the cushion, I knew I wanted strips of fabric but I wasn't too sure how many I should cut and the arrangement of the design. I cut 9 strips of fabric, each measuring 2.5 inches wide by 18 inches long. I spent time arranging the strips then sewed the strips together using a quarter inch seam.
I wanted to create a cushion with a slightly different look on the other side of the cushion so that it could be used either way. I decided to select three of my favourite fabrics from the different options I had, and cut each strip 6.5 inches wide by 18 inches long. I sewed the three strips together with a quarter inch seam.
I pressed the fabric pieces, flattening the seams...I then set about adding a zip (40cm long)...
...and then making my own piping for the cushion.
Adding the zip and the piping to the fabric was hard and took some time to finish, I had to unpick the stitching a few times to get the look I wanted with the piping.
As you can see the final cushion turned out really well (see photo at the top of the post and below). The second side of the cushion with three of my favourite fabrics looked good and meant that the cushion could be displayed either way.
I can't decide which side is my favourite. What do you think?
I’m so pleased that I made the cushion for my friend, seeing her face when she opened it and knowing that she liked it made me feel that the month or so of planning and finding the right fabric was worth it. The project taught me how to add piping to the cushion as well as a zip.
Having made this cushion it has spurred me on to make my own piped cushions for our flat. I've selected the fabric, I just need to sit down and make them.


No comments:
Post a Comment